Supplies Needed:
One transparency (Ink jet used here as I have an ink jet printer)
Your printer
The Image/words/etc you want to turn into a rub on
a popsicle stick, or a rub on applicator
Item you wish to apply the rub on to (cardstock/patterned paper)
Step One:
Print your image. You need to make sure
A) Your printer is set to print on a transparency
B) That you print on the SMOOTH side of the transparency.
C) Remember to click mirror image in your settings (either printer or program)
Step Two:
Let it dry about 10 mins or so before handling.
Step Three:
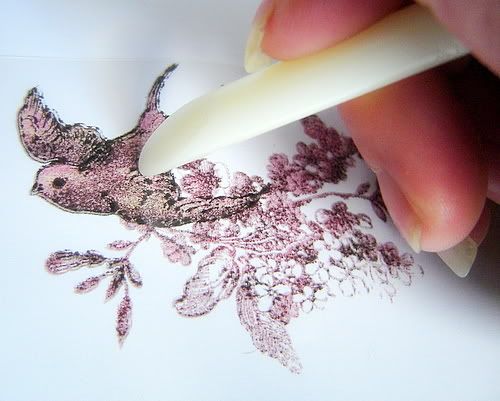
Apply your rub on to your project.
Voila! You are done!
This works awesome on Cardstock & Patterned Paper.
If you do not cut your transparency like I did, then you can re-use it.
Enjoy:)
I went ahead and fancied up my rub on.
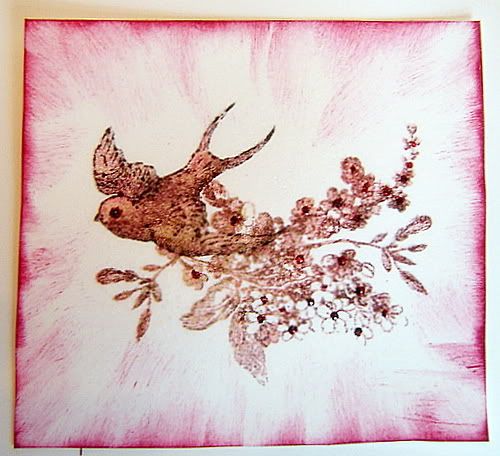
Supplies Used:
Red Stickles
Glimmer Mist (Red & Pearl)
Maroon Chalk Ink
Frame
White Cardstock
Credits: Digital Image - Rhonna Farrer.
Finished Project:
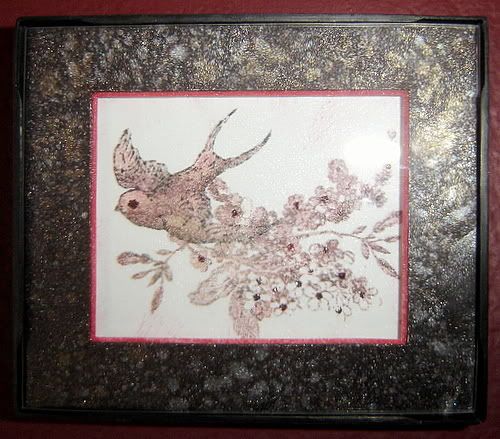
I must say - its looks pretty darn cute on my kitchen wall! Its too bad glitter photographs funny:)


1 comment:
Great tutorial. I love seeing things done.
If you print more than one image to a sheet dose the
second one smear while you apply the first one? Wanting to know if they need to be cut apart before being applied.
Thanks for doing the tutorial.
Kim
Post a Comment